The polymerase-chain reaction (PCR) is used to copy DNA, which is also known as amplifying it. It’s widely used in biology and medicine - pretty much anywhere DNA is analyzed or synthesized.
In this post I’m going to explain how I built a working prototype of a machine for doing PCR as a gift for my partner Sally. We will see that what a machine like this needs to do is actually very simple. And walk through a procedure for confirming that it is in fact able to turn a small amount of DNA into a larger amount.
How could you copy DNA outside of biology? Doing it mechanically would seem almost hopeless. DNA is a molecule that’s approximately a few dozen atoms wide (the size of atoms is not well defined, so this is just to give a sense of scale). The twisted helical structure means that the nucleotides in the rungs are packed just a few atoms-width apart. Miraculously, we do have machines that can assemble structures atom-by-atom. But they only work slowly on flat lattices at freezing temperatures in a vacuum to isolate the work from errant interactions and keep the atoms from jumping around. That’s basically the polar opposite of the three dimensional, hot, wet, and crowded environment inside a cell where DNA is usually found. On top of that, the human genome has 3 billion base pairs. So if you could precisely attach 1000 base pairs per second 100% reliably it would take more than a month to make a single copy this way.
So how does nature accomplish the feat? Like it accomplishes most things on this scale, with a protein. Proteins which assist reactions that take one thing and turn it into another are called enzymes. In this case the goal is to turn free nucleotides (1/2 a DNA ladder rung) into DNA. A molecule made of a chain of repeating subunits like DNA is called a polymer. So we are looking for a polymer-making enzyme, a.k.a. a polymerase. A great many of these have been found to exist but we’ll just look at a few special ones in this post.
Finding the first DNA polymerase (DNA polymerase I) won a Nobel prize for Arthur Kornberg in 1959. In the late 60s researchers found out how they could take these enzymes and use them to copy specific sections of DNA in a process that eventually became known as the polymerase chain reaction (PCR).
In essence what happens during PCR is that you pull the DNA helix apart…
-. .-.   .-. .-.   .-. .-.   .
||\|||\ /|||\|||\ /|||\|||\ /|
|/ \|||\|||/ \|||\|||/ \|||\||
~   `-~ `-`   `-~ `-`   `-~ `-
…so you have two lengths of single-stranded DNA:
------------------------------
| | | | | | | | | | | | | | |

| | | | | | | | | | | | | | |
------------------------------
Then you attach little sections of single-stranded DNA, called primers, to mark the spots where you want to copy the DNA. They are short, but long enough that they uniquely fit the points in the sequence that you care about:
-----. .-.   .---------------------. .-.   .-----
| | ||\|||\ /|| | | | | | | | | | ||\|||\ /| | |
    |/ \|||\||                     / \|||\||
    ~   `-~ `-                    ~   `-~ `-

    -. .-.   .-                   -. .-.   .
    ||\|||\ /|                     |\|||\ /|
| | |/ \|||\||| | | | | | | | | | |/ \|||\|| | |
----~   `-~ `---------------------~   `-~ `------
Now you let loose the DNA polymerase. In living organisms one of the roles they play is to go around repairing DNA. In the previous steps we basically made it look like all of the DNA needs repairing, except for the tiny sections where the primers have attached. The DNA polymerase finds one of those spots to start from and then starts running along the single strand, pulling free nucleotides from the surrounding solution and plugging them into their partners to complete the double strand. So when they finish the two halves of our original DNA strand have been “repaired” into two new segments of double-stranded DNA:
-----. .-.   .-. .-.   .-. .-.   .-----
| | ||\|||\ /|||\|||\ /|||\|||\ /| | |
    |/ \|||\|||/ \|||\|||/ \|||\||
    ~   `-~ `-`   `-~ `-`   `-~ `-

    -. .-.   .-. .-.   .-. .-.   .
    ||\|||\ /|||\|||\ /|||\|||\ /|
| | |/ \|||\|||/ \|||\|||/ \|||\|| | |
----~   `-~ `-`   `-~ `-`   `-~ `------
After running this process a single time we have basically doubled our DNA. If we run it again we will end up with 4x what we started with, then 8x, etc. Part of why PCR is so powerful is that it is an exponential growth process.
But there is a slight wrinkle at the beginning which I elided in the explanation above. The process wouldn’t start with a single strand of DNA in isolation. We would most likely already be starting out with many copies. And we provide many primer snippets. The primers won’t attach perfectly, so some strands might have none attach, or just the one at the start or the one at the end. But in the long run it doesn’t matter.
Any single strands that somehow avoid having primers attach (unlikely) will not be replicated, but they’ll be far outweighed by the majority that do. If a single primer attaches then the repair process will result in a much longer segment of complete DNA (it gets repaired past the spot marked by the second primer). The primers each send the polymerase in a specific direction, so this longer segment will contain the desired section as well as what comes after the second primer. But not the part before the starting point. So if the second primer attaches to them in the next cycle, the repair process will proceed from there towards the end where the first primer had attached in the last cycle. The result of that will be a copy of just our desired section. Any copies of our desired section will only result in more copies of our desired section.
So after many rounds of this process the copies of our desired section come to dominate the mix. If we run 40 cycles we will have trillions of our desired section (amplification of ~2^40) and a negligible number of the errant copies.
In the beginning it was extremely costly and labor intensive to run PCR because the first polymerases that were isolated would degrade in the course of running the reaction so you’d have to add more in each cycle. There was also no automation, so every time some DNA needed to be copied some poor soul would have to repeat the same steps for every cycle over the course of many hours.
That all changed with the discovery of Taq polymerase, which was found in a bacterium called Thermus aquaticus that likes to live in hot springs. Taq pol can survive temperatures that break apart DNA into single strands, which is a process called denaturing. It allowed PCR to be automated and carried out cheaply. Everything could be mixed together at the beginning and then run through the amplification cycles just by changing the temperature without worrying about destroying the polymerase and needing to add more. PCR with Taq pol proceeds like this:
With Taq pol in hand the key enabler of efficient PCR is the machine for efficiently and precisely cycling the temperature of the mix - a PCR thermocycler.
The thermocycler just needs to do a few things:
It’s not that hard to accomplish these things nowadays. There are many affordable or DIY thermocycler designs out in the world. Here are a few that I’ve looked at:
Why design another one? My partner Sally has been building a home DIY bio lab for her hobby biology projects and the workshops she runs to show people the process of going from a sample to DNA sequences. I’m making this machine mainly as a gift for her to support those projects. For me it’s also an excuse to get some practice doing industrial design. In the end most of the complexity in this project will be bringing everything together in a compact package that looks good and is a pleasure to use, not in the technical details of the PCR process.
To efficiently control the temperature of the PCR samples it needs to be possible to quickly dump heat into them and get it back out. In many designs this is accomplished with a Peltier heat pump, which relies on the thermoelectric effect to push or pull heat. But I’m keeping things simple by just using a resistive heater and a fan. Heating can be efficient this way but cooling will be limited.
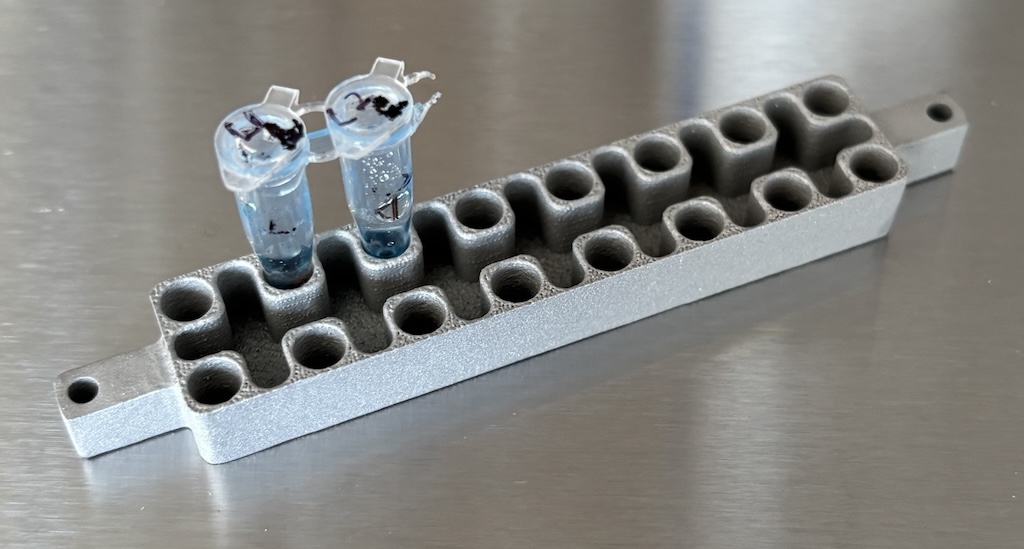
The interface between the heating/cooling system and the standard-sized sample tubes is called the heat block. It’s usually a thermally conductive metal grid of holes which fit the tubes. I had mine 3D printed in the aluminum alloy AlSi10Mg at PCBWay.

I wasn’t sure if 3D printing this was going to turn out well because it has fairly small features. But printing was an order of magnitude cheaper than having it machined. The end result turned out well. Total cost was $48.93 and it arrived in 10 days.

Later on I’ll be using a custom flexible PCB for the heater but to get started I got adhesive-backed heater PCBs off of Amazon.

I crudely attached an MCP9808 digital temperature sensor breakout board to the bottom with polyimide tape. It’s accurate to about +/-0.25C across the temperature range relevant for PCR. For the final design I am planning to integrate it into the heater PCB.
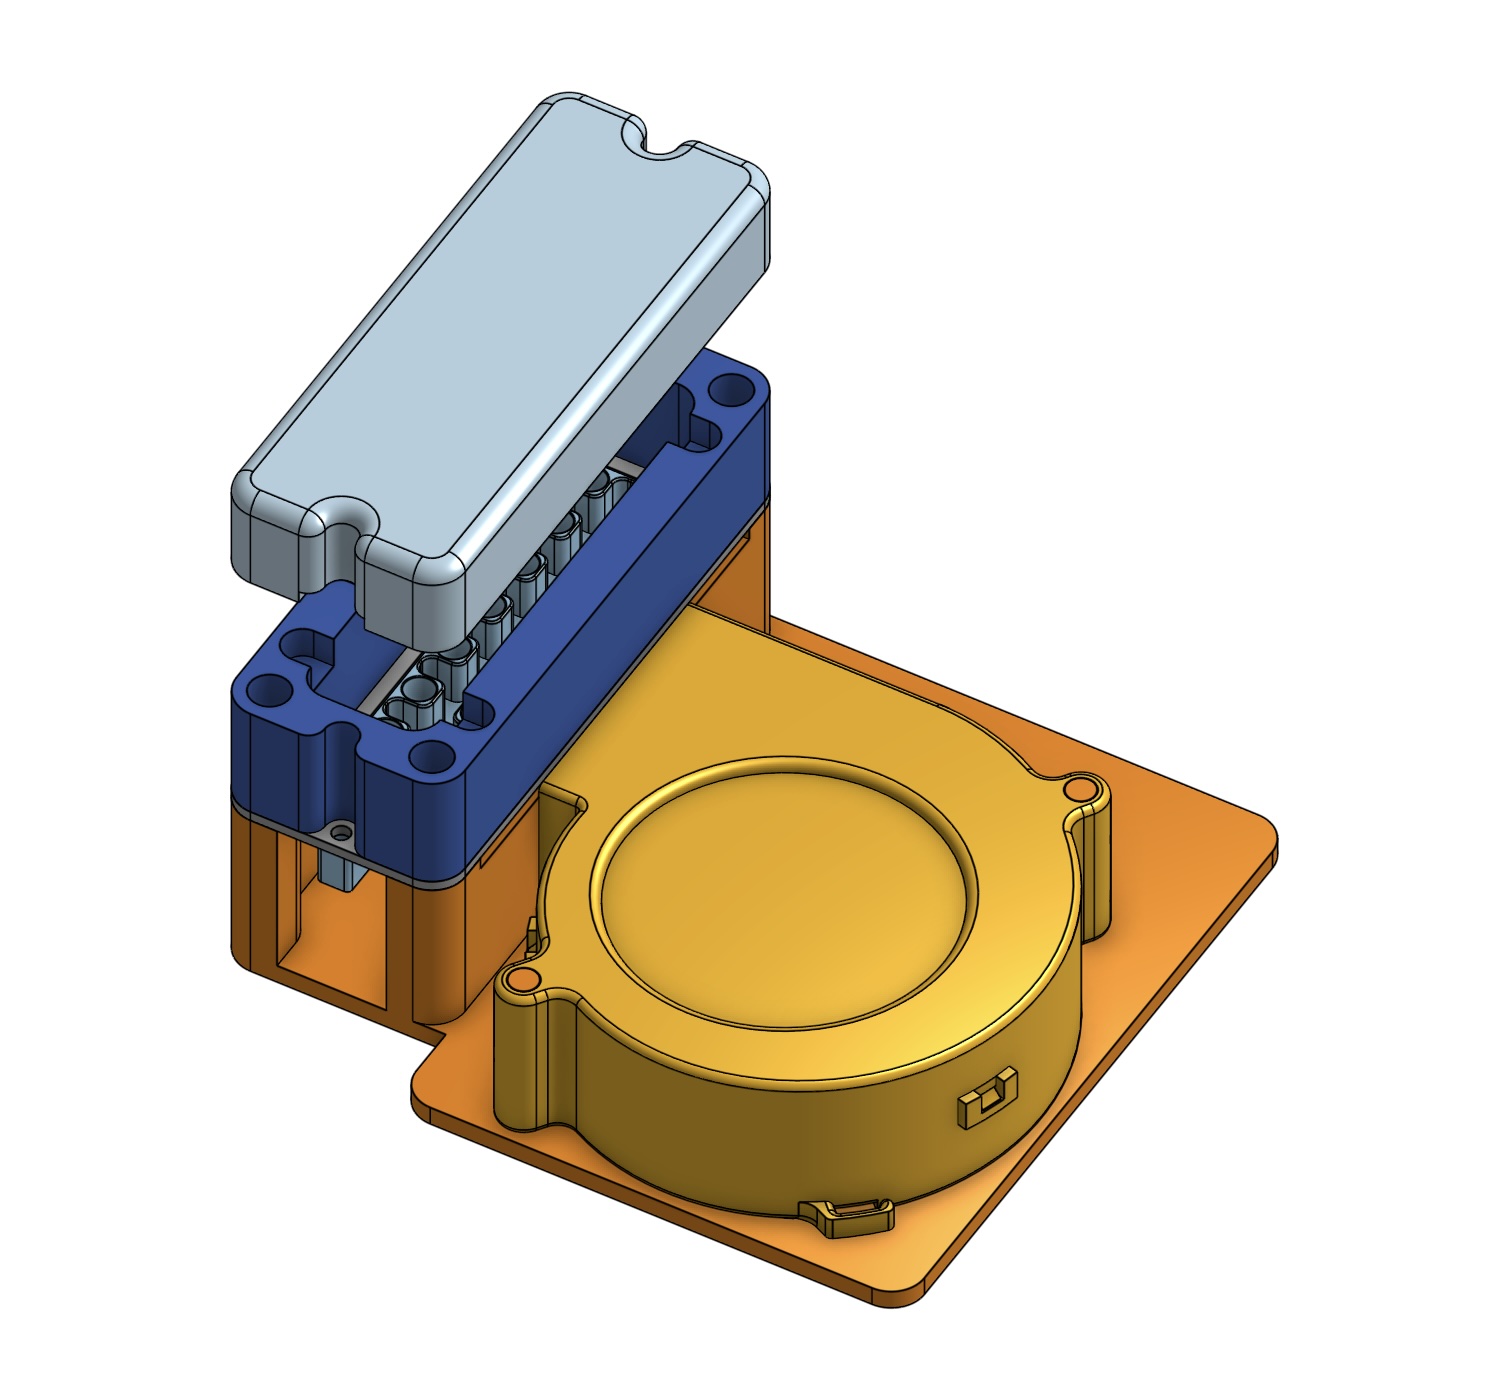
To assemble everything together I designed some 3D printed parts in CAD. There is a base that the blower fan attaches to. On top there is a milled PCB with all of the copper removed, which the heat block bolts into. The FR1 PCB material helps isolate the heat from the plastic parts, but it’s still cutting it somewhat close because the ABS they are printed out of starts softening at 105 C. There is a printed wall which helps create a chamber to hold in the heat.
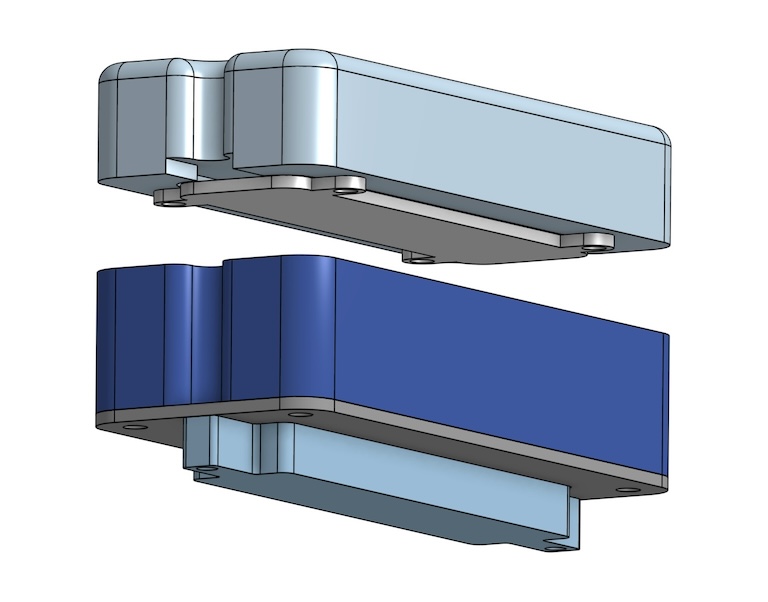
The lid incorporates another PCB which a second heater is attached to. This is a common feature of PCR thermocyclers used to prevent a high temperature differential between the top and the bottom of the sample tubes, which can lead to condensation. Condensation is an issue because it can substantially change the concentration of the mix in the tube, leading to unreliable results.
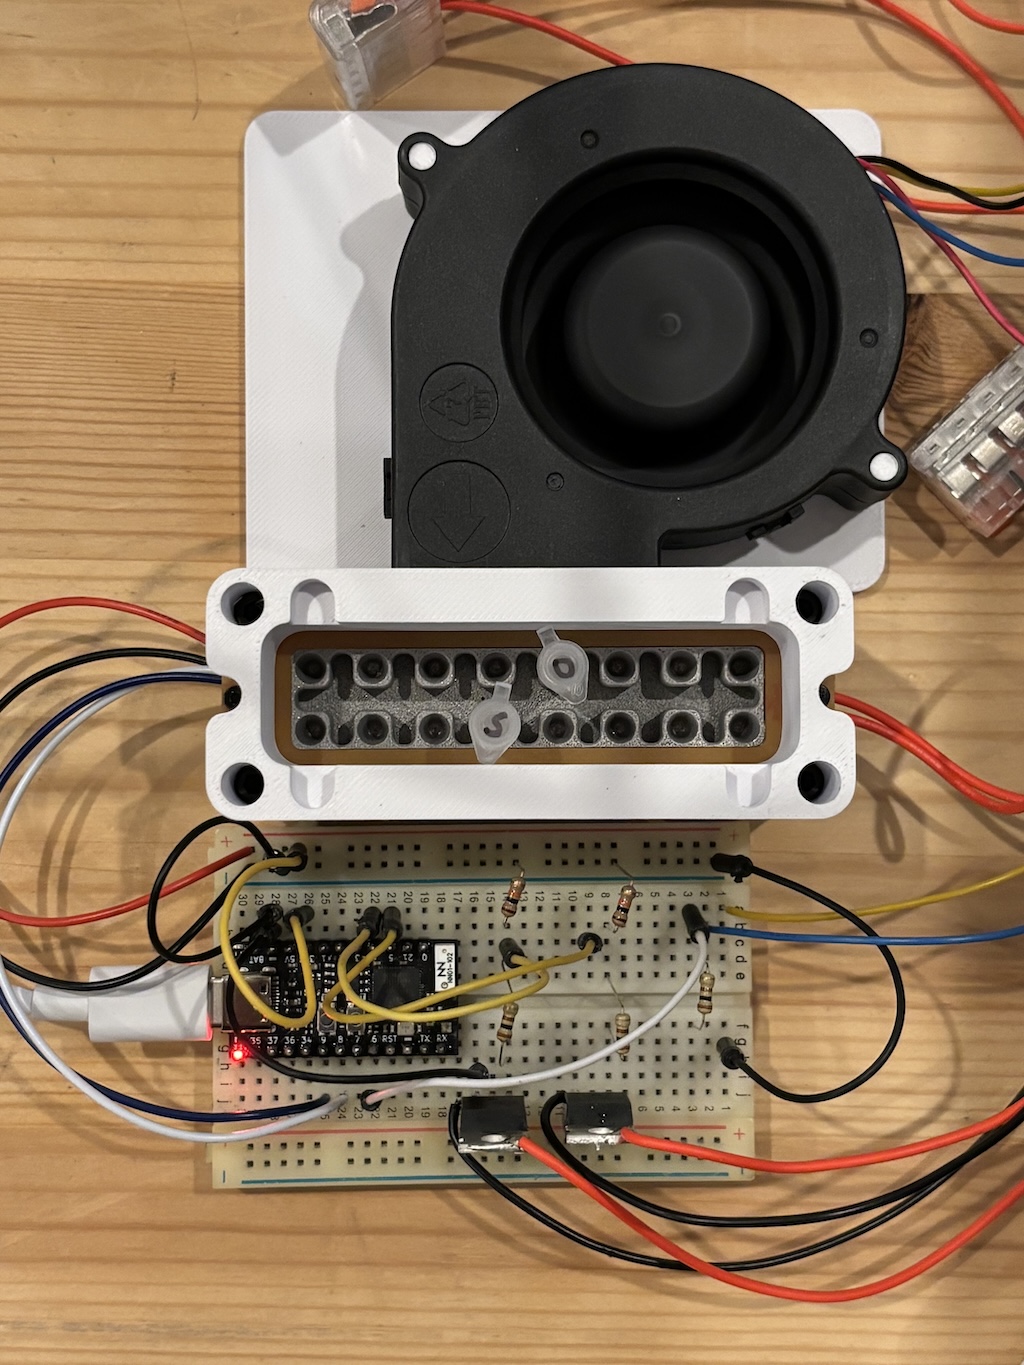
The prototype electronics are very simple. I used a TinyS3 dev board from Unexpected Maker because it includes an ESP32-S3, which is the SoC I intend to use for the final design. IRLB8721 NPN MOSFETs are used to turn the heaters on or off. The fan includes a PWM controller making it easy to adjust its speed from the dev board.
To make it track a target temperature I implemented a basic PID controller which looks at the temperature reported by the MCP9808 and adjusts PWM outputs for the fan and heaters as needed. The target temperature is adjusted over USB serial. A Python script running on my laptop was used to implement the temperature schedule for the PCR run.
I didn’t expect this setup to work well because the temperature at the MCP9808 should be substantially different than the temperature in the sample tubes and the PID controller won’t account for that. To hit the temperatures more accurately I’ll need to calibrate a model of the heat flow through the system and integrate that into the controller. I did some quick measurements with a kitchen probe thermometer in sample tubes containing water and found that it was within approximately a few C of the targets which seemed good enough to at least make a trial PCR run.
To test it out I enlisted Sally’s help. She had left-over primers from her Mitos project where she sequenced her mitochondrial DNA and turned the sequence into a weaving. And a friend gave her some Q5 DNA Polymerase master mix. Q5 is a novel engineered polymerase from New England Biolabs that is 280X more effective than Taq pol. The master mix has the polymerase, nucleotides, and the magnesium ions needed to run PCR.
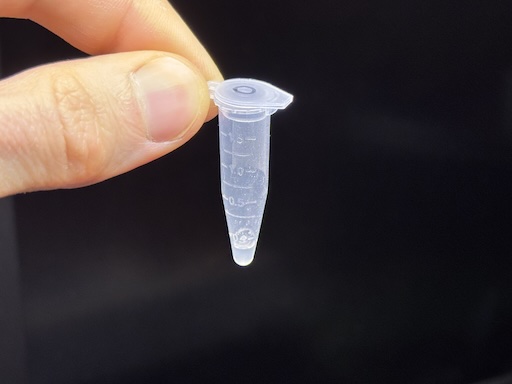
So we swabbed our cheeks with q-tips, then she lysed the cells in the samples using X-Amp, spun them down in her centrifuge, and combined the supernatant with the primers and PCR master mix.
After that we loaded the sample tubes into the thermocycler and I ran the following temperature schedule:
| # | Step | Time | Temperature |
|---|---|---|---|
| 1) | Initial denaturation | 60 seconds | 94 C |
| 2) | Denaturing | 30 seconds | 94 C |
| 3) | Annealing | 30 seconds | 58 C |
| 4) | Extension | 30 seconds | 72 C |
| 5) | Repeat steps 2-4 forty times | ||
| 6) | Final extension | 120 seconds | 72 C |
It took about an hour and a half to run through all of the cycles.
To know whether it worked and we made more DNA than what we started with Sally set up a gel electrophoresis run. The basic idea behind this is that DNA is charged so you can apply a force to it using an electric field. If you stick it in a porous gel that it can move through and apply an electric field it will start moving in one direction, but the speed will depend on how long the DNA is because the longer it is the more friction there is. So if you wait a while you will see bands of DNA of different lengths separate out in the gel. I remember seeing pictures of these gels as a kid in old crime shows when the investigators would do crime scene DNA analysis (it’s no longer done that way).
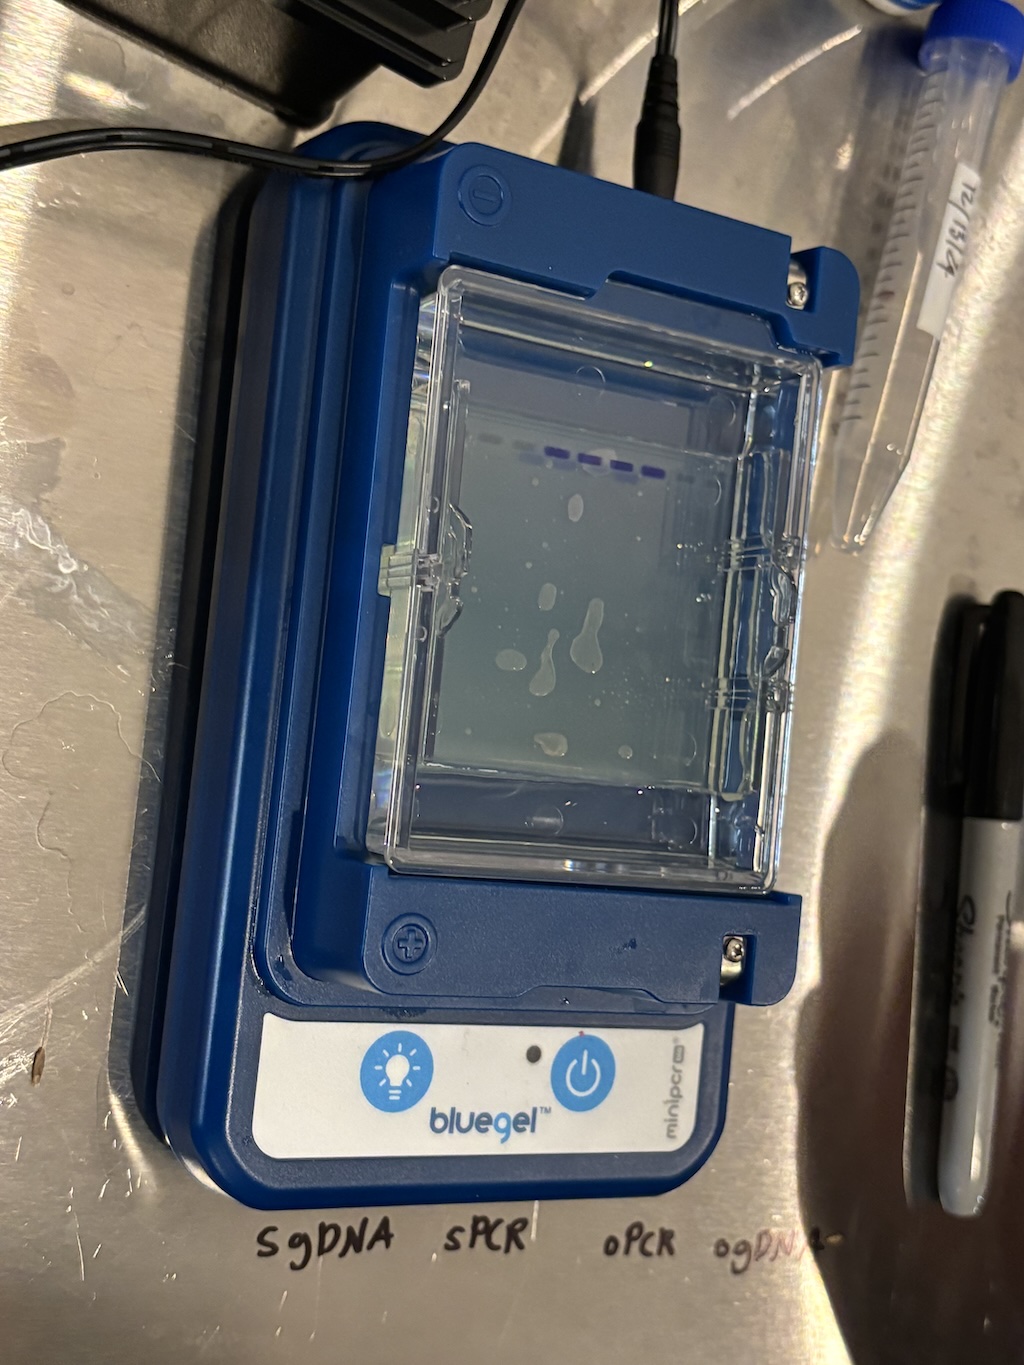
Sally made two samples for each of us. One came from the tubes that we ran PCR on and the other was some of the original DNA sample before PCR. By running these through the gel we could compare them and see if there was a difference. If we saw bands for the PCR samples but not for the original ones (or much lighter bands) then we could be confident that the PCR process actually amplified our DNA.
The buffer liquid that the gel is immersed in contains a stain which makes the DNA visible. All of the samples get a blue “loading” dye which helps keep them in place and visually keep track of them while setting up the gel. The actual stained DNA is the lighter color that you can see moving downward in the center two tracks. Those tracks contained the samples that went through PCR, so we know it worked! DNA from our cheeks was successfully amplified.
I was surprised the process was this forgiving. I wasn’t really expecting it to work at all without dialing in the temperature control more.
Now that I know the basics are working I’m diving back into the industrial design and working on packing it into a small portable format that is pleasant to look at and use. The electronics will get condensed into a custom PCB and I’ll add a UI to the device. A web app hosted by the ESP32 will let the schedule be adjusted and the operation tracked while the process is running. I’ll figure out how I’m going to manufacture the mechanical parts. A 3D printed heat sink will be added to improve the cooling efficiency. In the end I’m planning to share the design as open source.